As my interests in neuroscience continued to grow, I wanted to explore neuroscience from a different angle: research. I started sending cold emails to tens of labs at Stanford University but had not received one positive response due to my young age and university age restrictions. One lab had even initially said “Yes” to me but later backed out due to my age. Although I was disappointed, I was not ready to give up. I decided to diversify my efforts and reach out to labs at the University of California, San Francisco as well as Santa Clara University. Within a few emails to UCSF, I received a positive response from the Duan Lab in UCSF’s Ophthalmology Department and I immediately jumped on the opportunity. I received the “Yes” from the Duan Lab in March 2019, after which I visited the lab in person and started preparing for my internship by familiarizing myself with ophthalmology and reading numerous scientific papers on glaucoma research and treatment (to learn about the process of reading a research paper, visit this article).
Finally, it was time to start my internship. Because the internship was in San Francisco, I took the CalTrain to San Francisco and then walked to my lab each day of my internship for 8 weeks (which is how long my internship was). From the first moment I stepped into the lab, I was in absolute awe of my surroundings; I had never set foot in a professional wet lab before or handled live animals and chemicals. I was beyond excited to start my internship and learn the ins and outs of wet lab research. My mentor quickly introduced me to the lab members part of the Duan Lab as well as the different rooms that we would be working in.
Then, my mentor and I jumped right into the research. The goal of our research project was to identify genetic markers that could improve future glaucoma treatments using a mouse model. First of all, what is glaucoma and how is it caused? Glaucoma is an eye condition in which increased pressure in the eye, also known as intraocular pressure (IOP), causes eventual blindness. My mentor and I wanted to use two different genetic strains (KCNG and PZ2) of mice to determine which strain of mice’s retinal ganglion cells (RGCs) would have a greater survival rate under glaucomatous conditions of increased IOP. To test this, we had to first induce glaucomatous conditions in the mice’s eyes, next measure the IOP increase, and then dissect and finally image the retinas of the mice to determine which genetic group of mice had higher survival rates of RGCs.
First, my mentor and I had to induce glaucoma-like conditions in both the KCNG and the PZ2 mice’s eyes. To do this, we used silicone oil injections to increase the IOP and measured each mouse’s baseline IOP before surgery. I never actually performed the surgery since it was a much more complicated procedure than I knew how to do, but I loved observing the surgeries regardless. My mentor performed the surgery under the microscope, a skill which I found surprisingly hard to do. To perform the surgery, each mice was anesthetized so that it didn’t feel any pain. Then, my mentor carefully inserted the needle into the mouse’s eye and injected the silicone-oil. Initially, we used plastic-tipped needles to perform the injections, but then we realized that glass-tipped needles worked much better at delivering the silicone oil into the eye. Following the eye surgery, each mice was placed on a heating pad until their anesthesia wore off and then the mice were returned to their cages. Each subsequent week after the surgery of each mice, my mentor and I also measured the IOP of the mice to determine the increase in IOP as a result of the glaucoma-like conditions induced by the silicone oil injection. A normal IOP level is below 25 mmHg and once the mice’s IOP crossed that mark, my mentor and I harvested the eyeballs from the mice to dissect out the retina and image the retina to see how many RGCs survived.
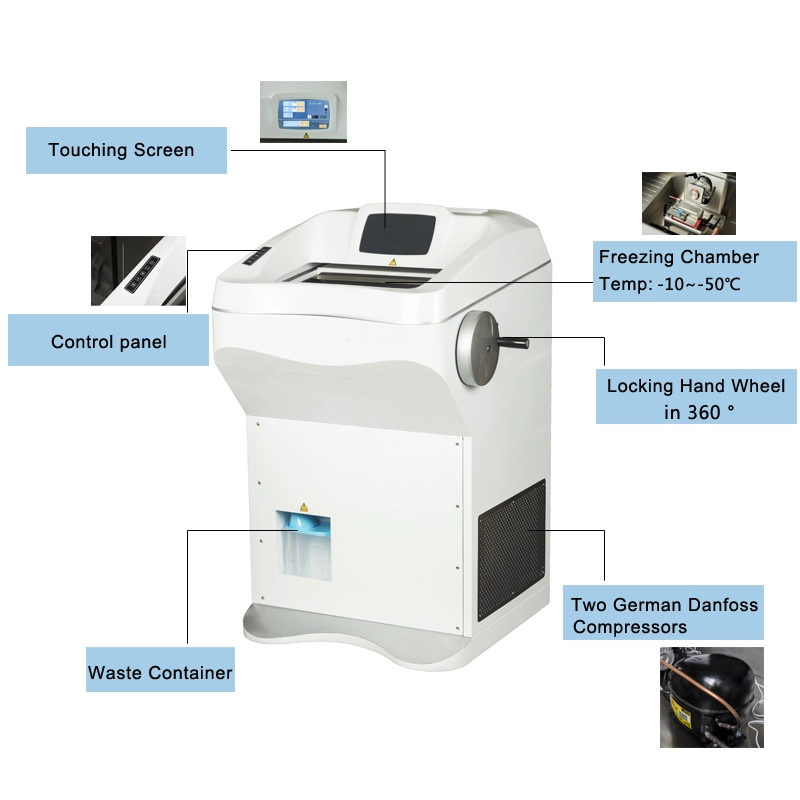
Once the eyeballs were harvested, they were placed in a fixing solution to make the eyeballs firm and easily dissectable. The following day, the eyeballs were ready to be dissected under the microscope to remove the retina from the rest of the eyeball. Once the retina was removed, it was placed in fixing solution to firm and then in freezing solution in preparation for cross-sectioning the retina. The retina was then placed in a -80℃ freezer so that it could freeze completely solid. Cross-sectioning the retina essentially meant that we were able to take extremely thin slices of the retina, about 10 nanometers in thickness, using a Cryostat machine. The Cryostat machine operated at a low temperature of about -15℃ so that the retina remained frozen in the freezing solution.
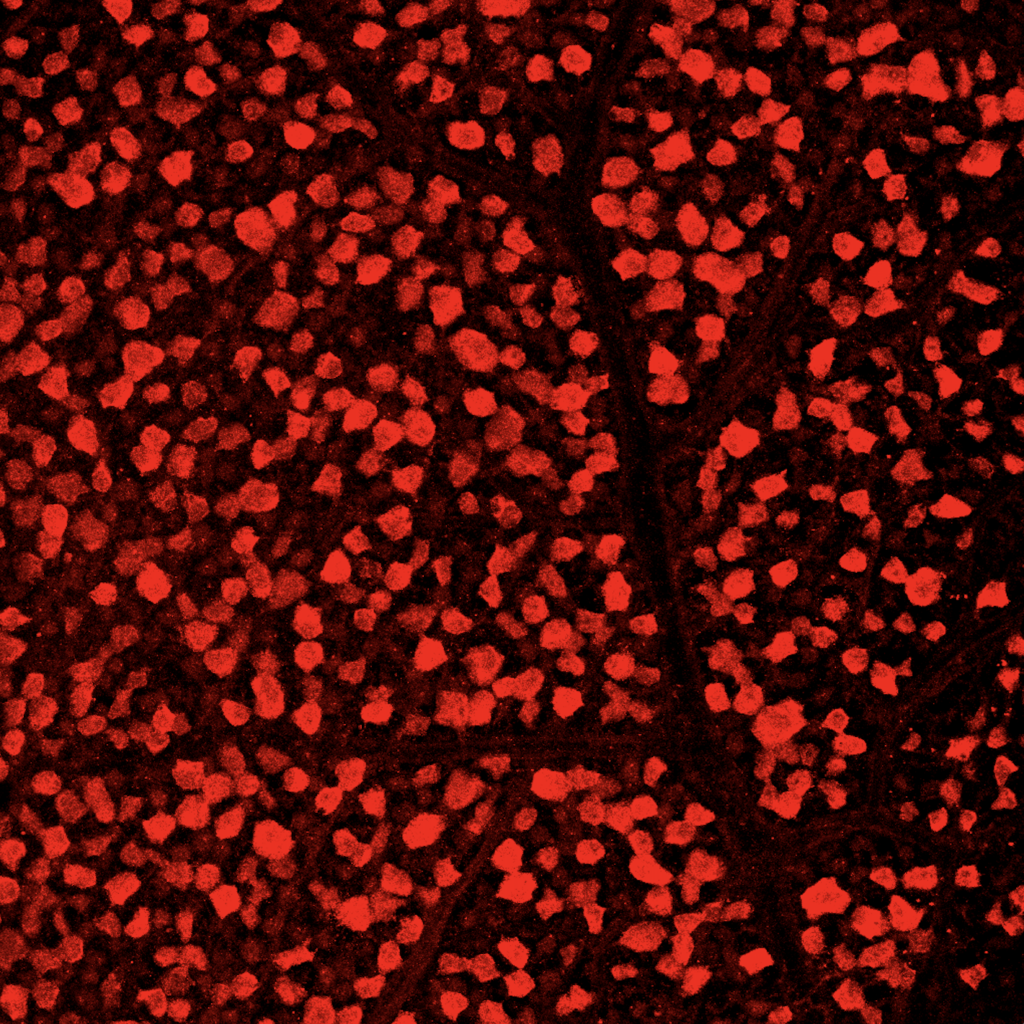
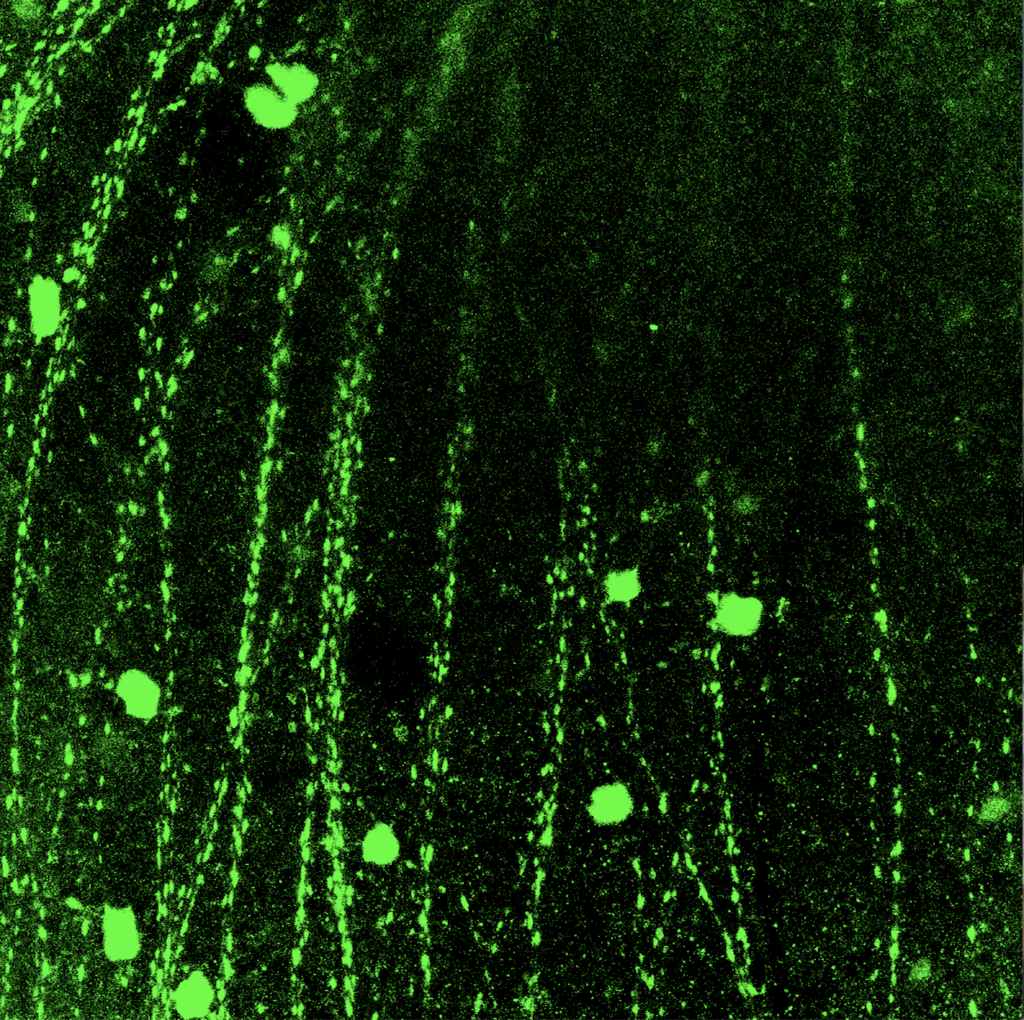
Once the retina was sectioned using the Cryostat, the individual cross sections of the retina were collected on several slides. Then, the cross sections were treated with special antibody solutions to stain them with two proteins, GFP and RBPMS. Each type of protein allowed us to see different types of RGCs when the slides were eventually imaged. The cross sectioned retinas were treated with the antibody solution for 1 to 2 days and then we imaged the samples. My mentor and I used an extremely powerful microscope with several different lighting settings to collect the images of the samples. I had never seen images of a sample before and I thought that each image was quite beautiful to look at.
I absolutely loved every minute of my research internship at UCSF. I learned immensely in a very short period of time and I learned by doing with my own hands, rather than learning by reading a textbook. To read about more of my thoughts about my research internship, working with live animals, and the overall results of my research, read part 2 of my UCSF research internship series. Also, to read about how to obtain your own research internship, visit this article.